
By Steve Shapiro
sks@skscci.com
I installed new LED fixtures in the coach last weekend. The trailer is a 2014 (bought in 2013, manufactured in late 2012) and the fixtures were originally incandescent. When I went to replace a burned out bulb several years ago, I noticed that there were signs of overheating as the plastic around the socket were browning.
So I replaced all of the bulbs in all of the fixtures with LED replacements. I chose daylight temp. It was almost as bright, but not quite. Plus, they were a lot cooler to the touch as they used a lot less electricity. With the incandescent bulbs the fan on the electric panel would come on even if only 1 fixture was lit. With the LED bulbs I could have all of them on, and no fan.
Recently one fixture started to flicker, and another would not always turn on. In both cases it appeared to be the switch going bad. Finding the switch was slightly more difficult than finding a unicorn. So, I decided to replace the entire fixture. I was unable to find an exact match (after all, they are 8 years old). So I decided to replace all 8 of them.
I found a good looking set on Amazon, and bought 2 sets of 5 (that was the package deal, and I would have a couple of spares for 8 years from now if necessary), so it was like buying 9 and getting 1 free. Replacement was pretty straight forward. Pop off the lens covers, remove 8 screws, untwist from the wire nut, swap fixtures, repeat in reverse, and do it 7 more times.
Looking at the photos you may notice that there are only 4 screws holding each fixture in place. This was done on purpose. The new fixtures are slightly larger than the originals. As such only 2 of the screw holes of the new fixtures lined up with those of the old ones. So, I reused those 2 holes. I did not want to turn my ceiling into swiss cheese, and add 6 new holes for all 8 units, so instead I decided to just punch 2 additional screw holes. The units are so lightweight that I found that 4 screws was more than sufficient.
During this process I did a bit of ‘manufacturing archaeology’. As I removed the original fixtures, I noticed that either the technician didn’t know what they were doing, or were incompetent, or careless, as I discovered that two of the fixtures had additional holes drilled for the mounting screws. To me this is a 25% defect rate. It almost makes me wonder what other hidden defects exist when they apparently can’t even screw in a light bulb (so to speak). But I digress.
The original fixtures were dual lamp, with a single switch for both sides. The new fixtures are dual lamp with a switch for each side. The new fixtures are also a LOT brighter (by choice). When only 1 side of the fixture is lit, it is about as bright as my old dual lamp fixtures.
As you would imagine, these also use more electricity than the LED bulb fixtures, but still not nearly as much as the incandescent bulb fixtures. Now when I turn them on, the electric panel fan comes on if 2 fixtures are lit. Still, the difference between the 2 sets of fixtures is amazing. Our next camping trip is in a couple of weeks and I am looking forward to the increased interior illumination.
Here is a link to the new fixtures that I bought on Amazon: 12V LED RV Ceiling Dome Light
Here are some photos.
The new fixture with the lenses removed.
New fixture with the lenses in place and both lamps turned on.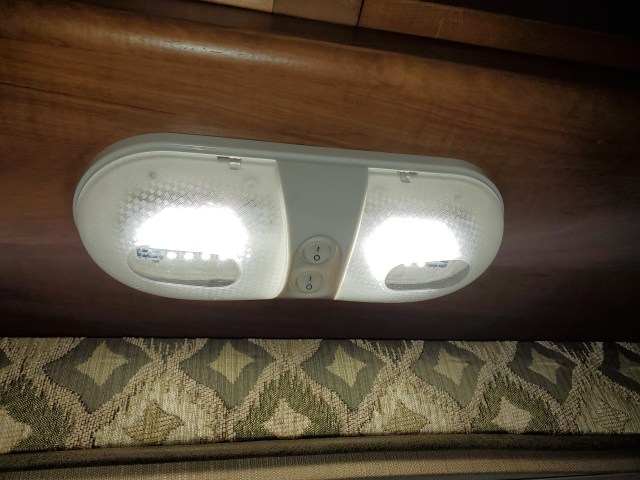
The old fixture with the lenses removed. Note the burn marks from the heat from the original incandescent bulbs.
The old fixture illuminated. Its hard to tell from the photo, but it is not nearly as bright as the new fixture.
SKS 6/11/20
